Search This Blog

Tuesday, December 29, 2009

TWD: Low and Luscious Chocolate Cheesecake

This weeks TWD was picked by The Tea Lady of Tea and Scones- Low and Luscious Chocolate Cheesecake, page 243.

Now, I'm not a big cheesecake eating person, but I love to bake them. Luckily, I have neighbors who love to eat them. When I eat it's pretty much a taste test. I can only eat a sliver and then I'm done. This recipe, though, reminds me of chocolate pudding so I could eat more than normal.

Dorie has you do this in the food processor and I tried that. It took more pulses than stated in the recipe so next time I would make it using the mixer. Other than that I believe it is a keeper.

Check out The Tea Lady's page for the recipe.


Monday, December 28, 2009

Macarons...attempt #3

Not an epic fail, but a fail nonetheless.

More cakes

done at work, though.

Friday, December 25, 2009

How To Eat a Cupcake's Spumoni cupcakes

Spumoni ice cream, hmmm, what can we say about it? Let's see, cold, flavorful, frozen, flavorful,cherries, flavorful, chocolate, flavorful, pistachio, oh yea, flavorful. This ice cream is one that I never tasted until my girlfriend, Gwen, told me about it. She looked at me crazy when I said that I had never tasted it. Now, me being a pistachio lover (I do mean a real pistachio lover, you know one of those that eat them like you have to have it to survive? Well, that's me...cake, nuts in and out the shell) and chocolate and cherry TOGETHER...it was definitely a must try!

Last year I met Cassie from How to Eat a Cupcake, because we worked at the same bakery. I would hear her talk about her blog and would always check to see what she was up to baking. This year she did an Iron Cupcake entry in the form of SPUMONI, SPUMONI, SPUMONI, YEA!!! Once again, this was definitely a must try http://www.howtoeatacupcake.net/2009/03/ironcupcake008-spumoni-cupcakes.html .

These cupcakes embodied everything Spumoni, right up to the pistachio buttercream. So, if you're ever in the mood for some Spumoni, but don't want the cold stuff, give this recipe a try. You just might be surprised.

M&Ms meet the Gingerbread Smurfs

The December 2009 Daring Bakers’ challenge was brought to you by Anna of Very Small Anna and Y of Lemonpi. They chose to challenge Daring Bakers’ everywhere to bake and assemble a gingerbread house from scratch. They chose recipes from Good Housekeeping and from The Great Scandinavian Baking Book as the challenge recipes.Y chose a Scandinavian recipe from The Great Scandinavian Baking Book and Anna chose Spicy Gingerbread Dough from Good Housekeeping.

I chose Anna’s recipe since I had some heavy whipping cream to use up. This recipe was super easy to make and roll out. I also love the flavor of it and how sturdy it is. After a mishap with my children’s gingerbread houses, I decided to do flat top buildings.
The thought of an igloo popped into my head after trying to come up with something different. Since Steph from http://raspberricupcakes.blogspot.com/ did one, and what an awesome one it was, I decided to have the M&Ms meet the Smurfs.

As kids I am sure all in my age group used to watch this show. I love the cartoons of our time, so why not have them meet someone I love now. The M&M theme runs rampant in my house so it was a perfect pairing.

For the mushroom houses I sandwiched circle gingerbread cookies with royal icing and let them dry. After they dried I then spread more royal icing all over the structure and rolled it in fondant. The tops of the mushrooms were the cookie baked on top of a half ball pan and later cemented together on top of the mushroom 'stalk'. I spread thinned out royal icing on the tops and decorated them.

Go to http://thedaringkitchen.com/ for more gingerbread houses. While you're there why not join.

Preparation Time for Anna's Recipe:
10 minutes to mix the dough, 4-8 hours at least to chill it, then 5 minutes to roll, 10 to rest, and 10 to cut. Another 30 minutes to rest, if necessary. 25-30 minutes to bake, depending on the size of the pieces. I would estimate 2-4 hours to decorate, depending on how ornate you want to make everything. It could certainly take longer if you are doing a lot of intricate royal icing designs or making your own candies. Altogether, this will take 7-13 hours, including chilling time. But, as noted above, you can break this up over several days or even a couple weeks if the freezer is utilized.

Equipment Needed:
Stand or handheld electric mixer (not required but it will make mixing the dough a lot easier and faster)
Plastic wrap
Rolling pin
Parchment paper
Baking sheets
Cardboard cake board or sheet of thick cardboard
Foil, if desired
Small saucepan
Small pastry brush (optional)
Piping bag with small round tip, or paper cornets if you're comfortable with them

Anna's Recipe:Spicy Gingerbread Dough (from Good Housekeeping) http://www.goodhousekeeping.com/recipefinder/spicy-gingerbread-dough-1571?kw=ist
2 1/2 cups (500g) packed dark brown sugar
1 1/2 cups (360mL) heavy cream or whipping cream
1 1/4 cups (425g) molasses
9 1/2 cups (1663g) all-purpose flour
2 tablespoon(s) baking soda
1 tablespoon(s) ground ginger

Directions

1. In very large bowl, with wire whisk (or with an electric mixer), beat brown sugar, cream, and molasses until sugar lumps dissolve and mixture is smooth. In medium bowl, combine flour, baking soda, and ginger. With spoon, stir flour mixture into cream mixture in 3 additions until dough is too stiff to stir, then knead with hands until flour is incorporated and dough is smooth.

2. Divide dough into 4 equal portions; flatten each into a disk to speed chilling. Wrap each disk well with plastic wrap and refrigerate at least 4 hours or overnight, until dough is firm enough to roll.

3. Grease and flour large cookie sheets (17-inch by 14-inch/43x36cm)

4. Roll out dough, 1 disk at a time on each cookie sheet to about 3/16-inch thickness. (Placing 3/16-inch dowels or rulers on either side of dough to use as a guide will help roll dough to uniform thickness.)

5. Trim excess dough from cookie sheet; wrap and reserve in refrigerator. Chill rolled dough on cookie sheet in refrigerator or freezer at least 10 minutes or until firm enough to cut easily.

6. Preheat oven to 300 degrees F (149C)

7. Use chilled rolled dough, floured poster board patterns, and sharp paring knife to cut all house pieces on cookie sheet, making sure to leave at least 1 1/4 inches between pieces because dough will expand slightly during baking. Wrap and reserve trimmings in refrigerator. Combine and use trimmings as necessary to complete house and other decorative pieces. Cut and bake large pieces and small pieces separately.

8. Chill for 10 minutes before baking if the dough seems really soft after you cut it. This will discourage too much spreading/warping of the shapes you cut.

9. Bake 25 to 30 minutes, until pieces are firm to the touch. Do not overbake; pieces will be too crisp to trim to proper size

10. Remove cookie sheet from oven. While house pieces are still warm, place poster-board patterns on top and use them as guides to trim shapes to match if necessary. Cool pieces completely before attempting to assemble the house

Preparation Time for Y's Recipe:
5-10 minutes to mix the dough, 2 hours to chill, 5 minutes to roll, 10 to cut and 15 minutes to bake. Estimated 4-7 hours from start to finish including chilling.

Y's Recipe:Scandinavian Gingerbread (Pepparkakstuga)from The Great Scandinavian Baking Book by Beatrice Ojakangas http://astore.amazon.com/thedarkit-20/detail/0816634963
1 cup butter, room temperature [226g]
1 cup brown sugar, well packed [220g]
2 tablespoons cinnamon
4 teaspoons ground ginger
3 teaspoons ground cloves
2 teaspoons baking soda
½ cup boiling water
5 cups all-purpose flour [875g]

1. In a large bowl, cream the butter and sugar until blended. Add the cinnamon, ginger and cloves. Mix the baking soda with the boiling water and add to the dough along with the flour. Mix to make a stiff dough. If necessary add more water, a tablespoon at a time. Chill 2 hours or overnight.

2. Cut patterns for the house, making patterns for the roof, front walls, gabled walls, chimney and door out of cardboard.

3. Roll the dough out on a large, ungreased baking sheet and place the patterns on the dough. Mark off the various pieces with a knife, but leave the pieces in place.

4. [I rolled out the dough on a floured bench, roughly 1/8 inch thick (which allows for fact that the dough puffs a little when baked), cut required shapes and transferred these to the baking sheet. Any scraps I saved and rerolled at the end.]

5. Preheat the oven to 375'F (190'C). Bake for 12 to 15 minutes until the cookie dough feels firm. After baking, again place the pattern on top of the gingerbread and trim the shapes, cutting the edges with a straight-edged knife. Leave to cool on the baking sheet.

Royal Icing:

1 large egg white
3 cups (330g) powdered sugar
1 teaspoon white vinegar
1 teaspoon almond extract

Beat all ingredients until smooth, adding the powdered sugar gradually to get the desired consistency. Pipe on pieces and allow to dry before assembling. If you aren't using it all at once you can keep it in a small bowl, loosely covered with a damp towel for a few hours until ready to use. You may have to beat it slightly to get it an even consistency if the top sets up a bit. Piped on the house, this will set up hard over time.


Time for New Traditions

This year was the first time ever making gingerbread houses in my household. It was already a planned event, but imagine my surprise when I found out that The Daring Bakers was doing that as a challenge this month.

As a child, we had a tradition of the kids going to bed early Christmas Eve because we knew our parents had present to put under the tree (you can only fool kids for so long, especially when you don’t have a chimney on the house…lol). On Christmas morning there was family breakfast and then a ceremony, which consisted of bible reading, songs, praying, and talks of the real meaning of Christmas. After the ceremony was done, we were able to open presents. Everyone said their thanks for the gifts and then we had to clean all the trash from the floor before playing with any toys. Man, I really miss those days!

Now that all the children have left the nest, our tradition is to meet for dinner at my parents’ house. After dinner and cleaning the dishes we have a smaller ceremony, talent show, and gift opening. This dinner date on Christmas has a house full of people. There are my parents, their 4 children, and 12 grandchildren. My girlfriend, Gwen, comes if she hasn’t taken a trip back home to Baton Rouge and whomever my siblings may bring. Goodness gracious, someone call the fire marshal!

Seeing as how there was never a gingerbread house made in all the years of my life, I knew I needed to try it at least once. This go round I made Tish Boyle’s Gingerbread Dough and cut out enough dough for 3 of my kids. I put the houses together using Wilton’s royal icing recipe and quickly found that I was really green. I thought it would be fairly easy, until I noticed how warped some of the pieces were. After putting together the first two, I started on the last one. Well, this little mothersucker (yes I said it, mothersucker) didn’t want to stay together. Well, as you can see in the pics, it became a flat-top.

Even with all that, they got decorated and later demolished.


Gingerbread Dough
From The Good Cookie by Tish Boyle
5 ½ cups unbleached all-purpose flour
1 teaspoon baking soda
¼ teaspoon baking powder
1 tablespoon ground ginger
1 tablespoon ground cinnamon
1 teaspoon ground cloves
1 teaspoon ground nutmeg
½ teaspoon salt
1 cup solid vegetable shortening
1 cup granulated sugar
1 1/3 cups unsulphured (mild) molasses
1 large egg
1 teaspoon vanilla extract

Sift together the flour, baking soda, baking powder, ginger, cinnamon, cloves, nutmeg, and salt into a large bowl. Set aside.
In the bowl of an electric mixer, using the paddle attachment, beat the shortening and sugar at medium-high speed until well blended, about 2 minutes. Add the molasses, egg, and vanilla extract and beat until well blended, about 2 minutes. If your mixer has a splatter shield attach it now. At low speed, add the dry ingredients in four additions, mixing just until blended. Scrape the dough out onto a work surface and knead it gently a few times, until smooth. Divide the dough into quarters and shape into disks. Wrap each disk in plastic wrap and chill for at least 1 hour, until firm (or up to 2 weeks).
Position a rack in the center of the oven and preheat the oven to 325°F.
Cut a piece of aluminum foil the size of a baking sheet. Place the foil on a work surface and place one of the dough disks on it. Place a piece of plastic wrap over the dough and oil it out evenly to a thickness of 3/16 inch. Remove the plastic wrap. Place as many pattern pieces as will fit on the dough, leaving at least ½ inch between the pieces (the dough pieces will remain in place on the foil during baking). Using a small sharp knife, cut the dough around the pattern pieces, being careful not to cut through the foil. Remove the pattern pieces from the dough. Remove all the dough scraps from between the pattern pieces and save to reroll. Carefully slide the sheet of foil onto the baking sheet. Repeat the process until you have cut out all the required pieces.
Bake the gingerbread, one sheet at a time, for 15-20 minutes, or until the dough feels firm to the touch. Carefully slide the foil off the baking sheet and onto a completely flat surface to cool (not onto a wire rack).
When the pieces are cool, carefully peel them off the foil. Store the gingerbread in an airtight container in a cool, dry place until ready to use (up to 2 weeks at room temperature; or freeze for up to 3 months).


Tuesday, December 15, 2009

TWD: Cafe Volcano Cookies

This weeks TWD was chosen by Macduff of The Lonely Sidecar- Cafe Volcano Cookies, page 153. These cookies were ridiculously easy to make. The have this nice crunchy texture and the nuts add a little something extra for your mouth. If you are in for a quick cookie recipe and you like nuts and coffee check out Macduff's page or purchase Dorie's cookbook and make some tonight.

Monday, December 14, 2009

Lebkuchen

I told you all about this cookie in a previous post http://deevassweetthoughts.blogspot.com/2009/12/cookies-cookies-cookies.html and here it is, finally. I made this cookie from Tish Boyle's The Good Cookie because 1. I had her book, 2. I wanted to see what it tasted like, and 3. Do I really need any other reason other than I like to bake?

I would have to say that the flavor of this cookie is not appeasing to me for some reason. I like all the spices in the cookie, but for some odd reason I just couldn't get down with them all together in this recipe. Maybe, I'll have to try it again one day and see if it was just a fluke. The recipe called for a glaze, but I opted for just powdered sugar. Even though I didn't care for this particular recipe, I would definitely give this cookbook two thumbs up. Check out Tish's site http://www.tishboyle.com/ for some gorgeous pictures and you must also check out both of her books.

Until next time readers...

Lebkuchen Bars from The Good Cookie by Tish Boyle
Makes 24 Bars

½ cup honey
½ cup firmly packed light brown sugar
1/3 cup granulated sugar
3 tbsp. unsalted butter, cut into tablespoons
1 ½ cups all-purpose flour, sifted
¾ tsp. baking soda
1 1/2 tsp. Ground cinnamon
1 tsp. ground cardamom
½ tsp. ground cloves
½ tsp freshly grated nutmeg
½ tsp. ground ginger
½ cup sliced unblanched almonds (I used blanched slivered)
1/3 cup candied orange peel, finely chopped (didn’t use)
1 large egg, lightly beaten
2 tbsps. freshly squeezed orange juice (I used lemon juice)
1 tsp. finely grated orange zest (didn’t use)
1 tsp. vanilla extract
¼ tsp. almond extract

Orange-ginger glaze
1 cup confectioner’s sugar
2 tbsp. freshly squeezed orange juice (I used lemon juice)
¼ tsp. finely grated peeled ginger
¼ tsp. vanilla extract

1. In a large nonreactive saucepan, combine the honey, brown sugar, granulated sugar, and butter and cook over medium- high heat, stirring occasionally, until the sugar is dissolved, the butter is melted, and the mixture just begins to boil. Remove the pan from the heat and let cool for 15 minutes.


2. Sift the flour, baking soda, cinnamon, cardamom, cloves, nutmeg, and ginger into a medium bowl. Set aside.


3. Stir the almonds, candied orange peel, egg, orange juice, orange zest, and vanilla and almond extracts into the cooled honey mixture. Add the dry ingredients and stir until blended. Place a piece of plastic wrap directly on the surface of the dough. Cover the top of the pan with another piece of plastic wrap and let the dough stand at room temperature for 8 hours, or overnight(do not refrigerate).


4. After the dough sits for the 8 hours it’s time to bake it. Position a rack in the center of the oven and preheat the oven to 350 degrees. Butter and flour a 9-inch baking pan.


5. Place the dough in the prepared pan and, with a spatula, spread it into an even layer. Bake the lebkuchen for 25-30 minutes, or until a toothpick inserted into the center comes out clean.


6. For the glaze whisk together the confectioner’s sugar, orange juice, ginger, and vanilla extract in a medium bowl until smooth.


7. When the bars are done, place the pan on a wire rack. Using a small offset metal spatula, spread the glaze evenly over the warm bars. Let the bars cool completely.


8. Using a sharp knife, cut the glazed square into 24 bars.
Store in an airtight container at room temperature for up to 2 months

A few more cakes


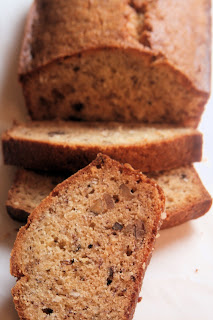
Martha Stewart's Banana Nut Bread

I love to make this recipe because it is chock full of goodies. I has a nice crunch, and yet it is still a soft piece of bread. Even after a few days on the counter it is just like it was fresh out the oven soft. I also decided to make some french toast out of it and that morning was fulfilled. You can use whatever mix you would normally use for french toast and have the same outcome. Give this recipe a try and you will understand how necessary it has to keep this in your recipe book.


Banana-Nut Bread
From Martha Stewart’s Baking Handbook

3 cups all-purpose flour
1 teaspoon baking soda
¾ teaspoon salt
3 large eggs
2 cups sugar
1 1/3 cups vegetable oil
2 tablespoons pure vanilla extract
1 ½ cups ripe mashed bananas (about 3 medium)
1 cup unsweetened shredded coconut
1 cup (about 4 ounces) walnuts or pecans, toasted and finely chopped
½ cup buttermilk
Nonstick cooking spray

Preheat the oven to 350°F. Coat two 9-by-5 loaf pans with cooking spray, set aside. In large bowl, whisk together the flour, baking soda, and salt; set aside.
In the bowl of an electric mixer fitted with the paddle attachment, beat the eggs, sugar, and vegetable oil on medium-low speed until combined. Beat in the flour mixture. Add the vanilla, banana, coconut, nuts, and buttermilk, and beat just to combine.

Divide batter evenly between prepared pans, smooth with an offset spatula. Bake, rotating pans halfway through, until a cake tester inserted in the center comes out clean, 60 to 65 minutes.

Transfer to a wire rack to cool for 10 minutes. Remove loaves from pans and let cool completely. Bread can be kept at room temperature, wrapped in plastic, for up to 1 week, or frozen for up to 3 months.


Daring Cooks Challenge

The 2009 Daring Cooks challenge was hosted by Simone of Junglefrog Cooking. Simone chose Salmon en Croute (or alternative recipes for Beef Wellington or Vegetable en Croute) from Good Food Online.
This months challenge was one I jumped at the chance to do. I loooooove, loooove, looove salmon. I was in Farm Fresh and noticed they had it on sale and had to have it. Since I am the only one in the house who loves fresh salmon, I bought 1 pound, but I halved it so I would only have enough for myself.
I made the shortcrust from scratch and like Simone said, it was really easy to make. This is definitely one salmon recipe I would make again, especially for a party.
Recipe source : Good Food online

A few notes first:
1.If you are making the short-crust pastry yourself; make sure not to add too much water as that will render the pastry too hard, making it impossible to roll out into the needed size. I made that mistake for the first batch and ended up using store-bought instead.
2. If you cannot find short-crust pastry (a I did) and don’t want to make it yourself, you can substitute with puff pastry. Do not use the packages that are available (at least in the Netherlands) for pies... Not the right dough! (I did make that mistake and the taste was just not that good)
3. The recipe does not call for adding any extra salt or other seasonings to the salmon. I found that the salmon could use just a little bit of extra flavor, so feel free to add some seasoning to your liking. Be careful not to use too much as the topping also adds flavor.
Variations allowed:Mandatory for this challenge is to cook with pastry.!
If you do not like fish or are allergic to salmon, you can substitute the salmon for the Beef version, which is Beef Wellington. Recipe below. Salmon can be substituted for another type of fish, although I am not sure which fish would do well in pastry. Vegetarian versions are also allowed. For a vegetarian version check out this recipe on my blog and leave out the chicken

Preparation time: Total prep time incl. cooking for the Salmon is 50 minutes
Total prep time for the Beef Wellington is 3 hours
Shortcrust pastry : 50 minutes (optional)
Equipment required:
For the Salmon en croute
oven
foodprocessor
rolling pin
For the Beef Wellington
Blender or food processor
Frying pan15 cm crepe pan or small frying pan or griddle
cling film
oven

Salmon en croute:
Ingredients
Mascarpone or creamcheese 5.2 ounces/150 gr
Watercress, rocket (arugula) and spinach - 0.6 cup/4.2 ounces/120 gr
Shortcrust pastry - 17.6 ounces, 500 gr. Use a butterversion such as Jus-rol which is frozen or dorset pastry. or... make your own!
Salmon fillet (skinless)- 17.6 ounce/500 gr
egg - 1 medium sized
Directions:
1.Heat the oven to 200°C/390 F. Put the mascarpone or cream cheese in a food processor with the watercress, spinach and rocket and whizz the lot until you have a creamy green puree. Season well.
2. Roll the pastry out so you can wrap the salmon in it completely (approx. 2-3 mm thick) and lay it on a buttered or oiled baking sheet (it will hang over the edges). Put the salmon in the middle. If it has a thinner tail end, tuck it under. Spoon half of the watercress mixture onto the salmon. Now fold the pastry over into a neat parcel (the join will be at the top, so trim the edge neatly), making sure you don’t have any thick lumps of pastry as these won’t cook through properly. Trim off any excess as you need to. Make 3 neat cuts in the pastry to allow steam to escape and make some decorations with the off-cuts to disguise the join if you like. Brush with the egg glaze.
3. Bake for 30 minutes or until the pastry is crisp and browned. To test wether the salmon is cooked, push a sharp knife through one of the cuts into the flesh, wait for 3 seconds then test it against the inside of your wrist; if it is hot, the salmon is cooked. Serve with the rest of the watercress puree as a sauce.

Shortcrust pastry
While this is not mandatory to do, I highly recommend making your own shortcrust pastry as it is very simple to do! As mentioned in the notes; please make sure to not add too much water as that is the key to having a successful shortcrust pastry. Watch this video to check the correct consistency of the dough
Making shortcrust pastry
Ingredients:
450 gr (15.8 ounces or 3.2 cups ) of plain all purpose flour
200 gr ( 7 ounce) cold butter
pinch of salt
Sift the flour into a large bowl, add the butter and rub in with your fingertips until the mixture resembles fine breadcrumbs. If you have a food processor you can use that as shown in the above video.Stir in the salt, then add 2-3 tbsp of water and mix to a firm dough. Knead the dough briefly and gently on a floured surface. Wrap in cling film and chill while preparing the filling.
For best results make sure the butter is very cold.

Instructions for Beef Wellington (serves 4)
Button mushrooms - 17.6 ounces/500gr (stalks removed and finely chopped)
Olive oil - 2-3 tbsp
thyme - 1 sprig
Beef fillet, center cut piece - 21.16 ounce/600 gr
English mustard - 1 tbsp
puff pastry (all butter pastry pack) - 17.6 ounce/500 gr
parma ham (prosciutto) - 3 slices
egg yolk - 1 pcs, beaten

For the herb crepes:
plain (all purpose) flour - 0.3 cup/1.76 ounce/50 gr
milk - 0.5 cup/125 ml
mixed herbs - 1 tbsp (chopped, use herbs such as cervil, chives and tarragon
butter - 0.5 tbsp

Instructions:
1. To make the crepes, whizz the flour, egg and milk with a pinch of salt in a blender or processor until smooth. Pour into a jug and stir in the herbs and some seasoning. Leave to rest.
2. Fry the mushrooms in a little oil until they give up all their moisture and it has evaporated, leaving you with a thick paste. Add the thyme leaves and some seasoning and keep cooking for a few minutes. Cool.
3. Stir the melted butter into the crepe batter, heat a 15 cm crepe pan and oil it lightly. Pour in enough batter to make a thin layer on the base of the pan, cook until the top surface sets and then turn over and cook briefly. Remove and repeat with the rest of the batter. This will make a couple more than you need so choose the thinnest ones for the recipe.
4. Sear the beef all over in a little oil in a very hot pan. Brush with the mustard, season and allow to cool.
5. Lay a large sheet of cling-film on a kitchen surface and put two crepes down on it, overlapping a little. Lay over the parmaham (prosciutto). Spread the mushroom mixture over the ham and put the beef in the centre. Roll the cling-film up, taking the crepe with it, to wrap the beef completely into a nice neat log. Chill for 1 hour.
6. Heat the oven to 200°C/390F. Roll out the pastry, remove the clingfilm and wrap the beef in the pastry like a parcel, with the ends tucked under. Trim to keep it nice and neat. Brush with egg, score with shallow lines across the top and chill for 20 minutes.
7. Cook for 20 minutes. The best way to test if the meat is done to your liking is to neatly and carefully stick a skewer into the beef, count to three and then test it against your inner wrist. If it is cold, the beef will be raw, if it is warm then the beef will be rare and if it’s hot, it’ll be cooked through. Leave to rest for 20 minutes before carving.


Tuesday, December 8, 2009

TWD:Sables

This weeks TWD was chosen by Barbara of Bungalow Barbara- Sablés, pages 131-133. I must say that I have always eyed these puppies in the cookbooks, but have never attempted them. Why you ask? I haven't the slightest, especially since I have made sugar cookies so many times. Yes, yes, I know they are not the same. But, hey they're close enough, right? No agreeance, okay, I'll leave it alone.

Well, anyways go check out Barbara's page or as I say, just pick up Dorie's book and try them for yourself.


Monday, December 7, 2009